If you have a VPN account from CITeS (Center for IT Services - UoM) and you want to configure your SoftEther VPN client on your ubuntu machine, this is the best guide for you. This blog post is a conversion to the linux environment from the guide here given for windows environment . I’ll explore the steps in general and give the example using CITeS VPN account. So you can apply the same procedure for another VPN server account too.
As a prerequisite you should have created an account from a VPN server. (For this case from CITeS VPN server)
1.Download and Install SoftEther VPN Client
- Download SoftEther VPN Client software from their official website (https://www.softether.org)
- Navigate to
Download — > Download SoftEther VPN
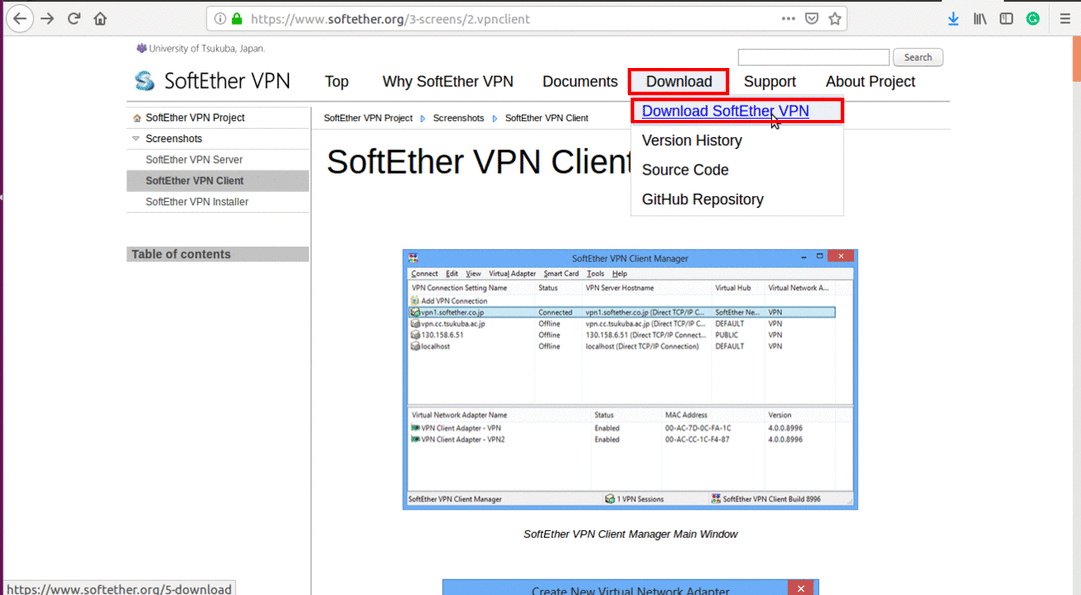
3.Click on Download SoftEther VPN link.

Select Component : SoftEther VPN Client
Select Platform : Linux
Select CPU : Select the appropriate CPU from the Drop down

4. Click on the appropriate downloading link based on the version of the software.
5. Extract the downloaded tar.gz file. Here after I will refer the extracted folder as <vpnclient>
6. Navigate to <vpnclient>folder and open a terminal.
7. Execute make command and accept all license agreements by entering the number relevant to “Yes”.

8. After the completion of make command process, start the vpn client using:
sudo ./vpnclient start
9. Then you will get the following message.

10. Before going to the configuration part please test the VPN client installation.
11. Execute ./vpncmd and select No 3 to enter to Use of VPN Tools (certificate creation and Network Traffic Speed Test Tool) option.
12. Then run check command.
If all tests are passed, you are good to go.

13. Press Ctrl+C to terminate that process.
2.Configure SoftEther VPN Client
- Execute
./vpncmdon a terminal opened inside the <vpnclient> folder. - Select №2 to enter to the
Management of VPN Clientoption. - Press Enter when you are asked for
Hostname of IP Address of Destination - Then you will connect to the
localhost.

5. Create a virtual interface to connect to the VPN server.
NicCreate <name for virtual interface>
eg : NicCreate vpn_se
6. Create an VPN client account using the following command.
AccountCreate <name>
In this case : AccountCreate CITeS
7. Then setup the account with your details.
Genearlly,
Destination VPN Server Host Name and Port Number:<VPN IP address>:<SoftEther VPN Port>
Destination Virtual Hub Name: <Hub Name>
Connecting User Name: <Username of LMS, Moodle, UoM_Wireless, UoM Email>
Used Virtual Network Adapter Name: <Created virtual interface’s name>
Specifically,
Destination VPN Server Host Name and Port Number:svpn.mrt.ac.lk:443
Destination Virtual Hub Name: <Enter the appropriate one according to the following drop down>

Connecting User Name: <Username of LMS/ Moodle/ UoM_Wireless/ UoM Email>
Used Virtual Network Adapter Name: vpn_se (earlier created one)
You will get The command completed successfully message if you do it correctly.
8. Setup a password to the created account.
AccountPassword <account name>
Set a password and confirm it. SPECIALLY, for CITeS account you should give LMS/ Moodle/ UoM_Wireless/ UoM Email password
For Specify standard or radius: input give radius
9. Now you can connect to the SoftEther VPN clinet account through the created account. For that issue:
AccountConnect <account name>
In this example: AccountConnect CITeS
10. Issue the command AccountList and check the connectivity. If you get Connected status it is good to to for the next step.

3. Add Route to the Routing Table
- Issue
cat /proc/sys/net/ipv4/ip_forwardto check whether ip forward is enabled in your system.
If you get “1” go to the step №2 .
If you get “0” , Navigate to /etc/sysctl.conf file and uncomment net.ipv4.ip_forward=1 line. Open a terminal and issue command sysctl -p
Then check whether you get “1” for the first step.
2. Open a terminal and issue the command sudo ifconfig . Now you should see the virtual network adapter you created earlier. But you do not have a ip address for it.
3. Issue the command sudo dhclient <virtual_network_adapter_name>
According to the above example : sudo dhclient <vpn_vpn_se>
After few moments you will get an ip address from the VPN Server.
4. Then issue sudo netstat -rn command to see the routing table. You need to add a static route here.
sudo ip route add <gateway of the ip range of your virtual network adapter>/<subnetmask> via <ip you got for the virtual network adapter>
Except the last route adding step all of the above steps are one time work.
Now you should able to connect to the required server through the VPN Client. 😃
Cheers. 🥳
Software Engineer@ WSO2 | Computer Science and Engineering graduate@ University of Moratuwa, SriLanka
No comments:
Post a Comment